C++ to Rust - or how to render your mindset
Introduction
Original Chapter 1
Update
Thank you wholeheartedly for the support and the comments on this post. Some mistakes were fixed and some things are now better clarified. Also thanks to soruh for the optimization PR to the repository (already merged). The relevant benchmarks are mentioned there and the code is parallelized with rayon. If you are interested in the discussion take a look here. The main branch contains some improvements over the original code in this post, so check it out for some cool things such as Rust macros or the aforementioned parallelization.
Every programmer wants to feel loved (yes I am looking at you!), be it by others or yourself. Usually you really love yourself when you accomplish something you are proud of. That is why from time to time programmers tend to learn languages (be it programming or spoken ones - unless you can talk to your fridge in assembly of course) or challenge themselves and write tough and unintelligible pieces of code which do something amazing. If you are like me and were always amazed by how the computer can render something resembling real life instead of just 2D graphics, you came to the right place!
Cutting the slack, I will reimplement the amazing tutorial on Ray Tracing in One Weekend in the Rust programming language. This post is aimed at people who are interested in the subject of rendering and want to try Rust, or are simply curious about how things are done in this language. I will not go through all content, but only focus on parts which are starkly different from the original implementation. The code for this project is available on this GitHub repo.
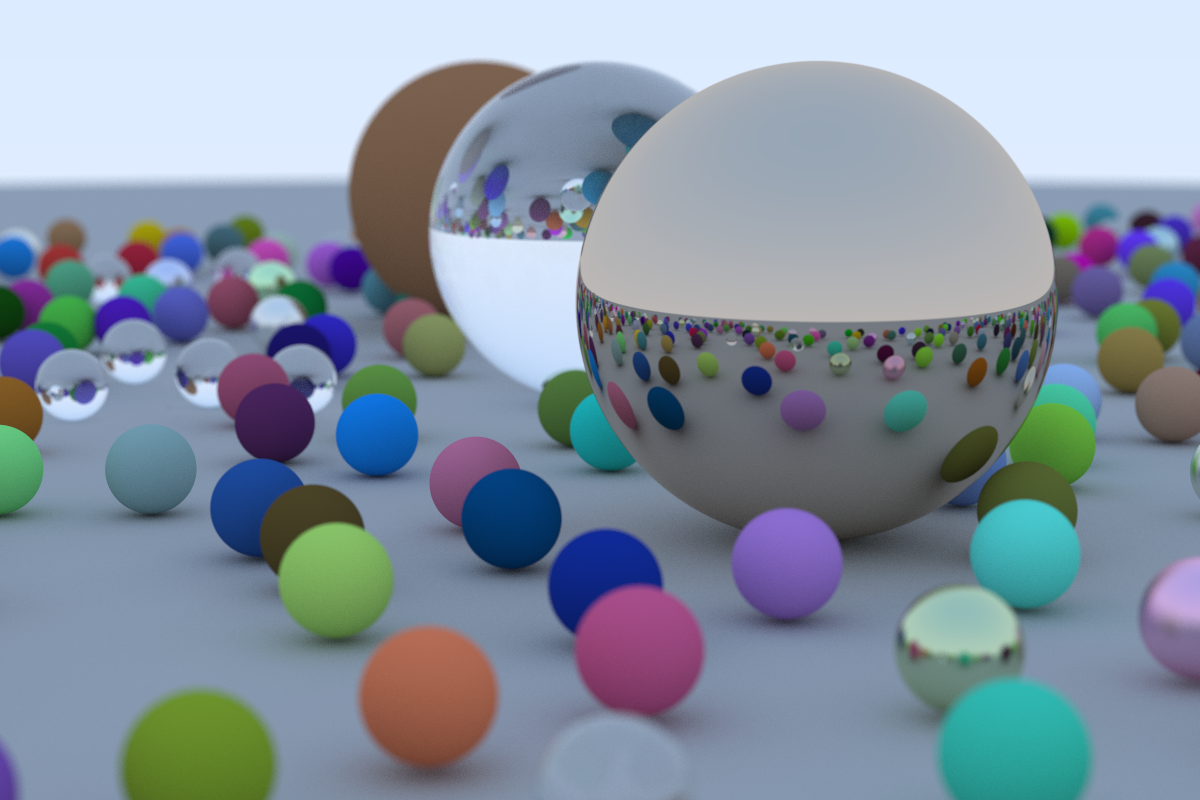
We aim to obtain such a render at the end of this tutorial.
Although you can just read through the whole thing and see how things are done differently in Rust compared to C++ or C, I recommend reading through the original tutorial and implementing the code yourself! Nevertheless, be prepared to learn a great deal about why and how Rust does some things the other way (the modern one?). Of course, do read The Rust Programming Language, in which you can find a comprehensive intro to Rust, or if you prefer less reading and more code look no further than Rust by example.
This is yet another blog post in the style of RIIR but with educational aims (don’t hang me for it, please). The target audience should have some knowledge of programming (especially in C or C++). Assuming you are the target audience, Rust knowledge is not required but as stated before, do read up the official tutorials - this one is for those who want to have a sense of accomplishment and a pretty solid infant renderer.
Views expressed here are my own only… you know the rest.
I promise, this is the last paragraph that keeps you from writing actual code. I will link relevant paragraphs from the original tutorial so you can see where the code differs so much it was worth me rambling on it.
Outputting an image
Original Chapter 2
Time to get our hands dirty and code something! Rendering something is most fun if we can actually see the result, so we need to create a function which will save our rendered image into a PPM image format (probably due to its simplicity).
Each time there is code to compare, I will paste both the C++ code and its Rust counterpart so you can spot the differences. I will only attach some of the images from the original post and instead provide direct links to them.
The C++ code:
#include <iostream>

int main() {

    // Image

    const int image_width = 256;
    const int image_height = 256;

    // Render

    std::cout << "P3\n" << image_width << ' ' << image_height << "\n255\n";

    for (int j = image_height-1; j >= 0; --j) {
        for (int i = 0; i < image_width; ++i) {
            auto r = double(i) / (image_width-1);
            auto g = double(j) / (image_height-1);
            auto b = 0.25;

            int ir = static_cast<int>(255.999 * r);
            int ig = static_cast<int>(255.999 * g);
            int ib = static_cast<int>(255.999 * b);

            std::cout << ir << ' ' << ig << ' ' << ib << '\n';
        }
    }
}
Rust:
fn main() {
    let image_width = 256;
    let image_height = 256;

    println!("P3\n{} {}\n255", image_height, image_width);

    for j in (0..image_height).rev() {
        for i in 0..image_width {
            let r = i as f64 / (image_width - 1) as f64;
            let g = j as f64 / (image_height - 1) as f64;
            let b = 0.25;

            let ir = (255.999 * r) as i32;
            let ig = (255.999 * g) as i32;
            let ib = (255.999 * b) as i32;

            println!("{} {} {}", ir, ig, ib);
        }
    }
}
This should result in an image looking like this - you can view these images with most viewers as this is quite common image format for ASCII encoded images.
The first stark difference is the for loop - Rust uses syntax similar to Python and supports looping though iterable objects thanks to the Iterator trait (we will get to traits soon enough, for now it is a kind of interface). Looping forwards is easy, as you just specify the range of iteration like this:
for i in 1..10 {
    println!("looping: {}", i);
}
You can also loop in steps similar to the C++ i += 2 by using this syntax: for i in (1..10).step_by(2), but how do you loop backward? I probably spoiled the fun as the answer is visible above, a range already implements the Iterator trait, and for other types you create an iterator from them by yet another trait called Into which is a reciprocal of From - in short it allows the programmer to specify legal conversions between types in Rust. So, we take a range of values, call the rev() function on it (provided by the Iterator trait) and voila, we got our reverse loop: for i in (1..10).rev().
Barring from some syntax differences, the program is quite similar to the original version, we use as instead of C-style (unsafe) casts and static_cast<T>s. This cast will of course detect any mismatch at compile time.
Building the code
You will of course need a way to build the code and run it, and this is a good opportunity to introduce you to the first key selling point of Rust: Cargo. This is both a build system and a package manage (think like Python’s pip but with Makefiles on top of it). Forget about annoying CMake or writing Makefiles by hand - finally we have something with an easy-to-read syntax: TOML. Cargo, of course allows for creating targets and managing compiler and linker flags but removes all the nitty-gritty details of including files and setting up export options.
In order to create a new project you just need to run cargo new coolprojectname and if you want to build it and run you may run cargo run or cargo build if you want to build it only (and have a brief lesson in Rust compiler messages). For the release builds, just pass the flag --release to the compiler (and be sure to run this project with this command, otherwise be prepared for long trips to kitchen to kill the time while the scene renders).
Vec3 helper class
Original Chapter 3
Because we will be using some heavy 3D maths, we will need a helper class capable of performing some operations automatically instead of writing them by hand. This is where our code starts to diverge (rather strongly I would say). The original class relies on standard C++ features such as constructor and operator overloading with a sprinkle of friend functions on top, while Rust has no notion of overloading and instead achieves these things with the power of traits and generics which are also present in C++ albeit wear a cover of templates. I will not go into much detail on the topic of run-time vs compile-time polymorphism, but if you are eager for a read then I leave one.
C++:
#ifndef VEC3_H
#define VEC3_H

#include <cmath>
#include <iostream>

using std::sqrt;

class vec3 {
    public:
        vec3() : e{0,0,0} {}
        vec3(double e0, double e1, double e2) : e{e0, e1, e2} {}

        double x() const { return e[0]; }
        double y() const { return e[1]; }
        double z() const { return e[2]; }

        vec3 operator-() const { return vec3(-e[0], -e[1], -e[2]); }
        double operator[](int i) const { return e[i]; }
        double& operator[](int i) { return e[i]; }

        vec3& operator+=(const vec3 &v) {
            e[0] += v.e[0];
            e[1] += v.e[1];
            e[2] += v.e[2];
            return *this;
        }

        vec3& operator*=(const double t) {
            e[0] *= t;
            e[1] *= t;
            e[2] *= t;
            return *this;
        }

        vec3& operator/=(const double t) {
            return *this *= 1/t;
        }

        double length() const {
            return sqrt(length_squared());
        }

        double length_squared() const {
            return e[0]*e[0] + e[1]*e[1] + e[2]*e[2];
        }

    public:
        double e[3];
};

// Type aliases for vec3
using point3 = vec3;   // 3D point
using color = vec3;    // RGB color

#endif
Rust
use std::fmt;
use std::ops;

#[derive(Clone, Copy, Debug, Default)]
pub struct Vec3 {
    pub x: f64,
    pub y: f64,
    pub z: f64,
}

pub use Vec3 as Point3;
pub use Vec3 as Color;

impl Vec3 {
    pub fn new(x: f64, y: f64, z: f64) -> Vec3 {
        Vec3 { x, y, z }
    }

    pub fn length(&self) -> f64 {
        self.length_squared().sqrt()
    }

    pub fn length_squared(&self) -> f64 {
        self.x * self.x + self.y * self.y + self.z * self.z
    }
}

impl ops::AddAssign<&Vec3> for Vec3 {
    fn add_assign(&mut self, rhs: &Vec3) {
        self.x += rhs.x;
        self.y += rhs.y;
        self.z += rhs.z;
    }
}

impl ops::MulAssign<f64> for Vec3 {
    fn mul_assign(&mut self, rhs: f64) {
        self.x *= rhs;
        self.y *= rhs;
        self.z *= rhs;
    }
}

impl ops::DivAssign<f64> for Vec3 {
    fn div_assign(&mut self, rhs: f64) {
        self.x /= rhs;
        self.y /= rhs;
        self.z /= rhs;
    }
}
First important thing to note is that Rust provides no constructor overloading and achieves similar goals with the Builder Pattern. This pattern is quite popular and has been with us for quite some time now and it neatly fits in the assumed immutability philosophy of Rust. So instead of providing an overloaded constructor for every type, you call the builder and chain functions like this:
let vector: Vec3 = Vec3::new(1.0, 2.0, 3.0).frobnicate().build();
Quite simple, isn’t it?
And it removes much of the noise related to the class (rule of the 5? anyone?).
However, we will go even simpler route an simply provide various constructor functions. Using builder here would be a pretty big overkill. Rust goes even further so that we don’t need to provide a default constructor when we derive a Default trait. It manages all the initialization for us and does this properly.
You may have noticed the self and mut self arguments to the functions of this class (yes I know, it is a struct) - these are the indicators that this is a method compared to ordinary associated function (you may know them as static methods from C++).
Probably quite important design decision worth mentioning now is that I am storing the x, y, z components separately instead of a static array of this form: [1.0, 2.0, 3.0];. You could do both and just benchmark it later, but remember that you cannot modify elements of this array without a &mut, you also cannot resize this array (treat it as a statically allocated C array with normal Rust ownership rules). If you need resizable arrays on the spot then look no further than a vector or Vec in Rust terms. There are some situation in which you need more than one mutable reference to an object. In these circumstances, wrap them in Cell or bring upon thyself wrath of the Rust gods for using unsafe code where it can be avoided. It is often just a matter of preference, and what is more optimal for you!
This brings us to the most glaring difference - operators or the lack thereof. Rust handles them via traits and requires to provide the impl block if one wishes to use them with custom types. Thus, we have types such as Add, AddAssign and others, where all we as implementors have to do is provide the similarly named function implementation.
The next step is quite similar so I am not including the code for it here - we have to implement the friend functions for adding two Vec3s and some utility functions. Implementing the std{io,err} printing is worth looking at though, so here it is:
C++:
inline std::ostream& operator<<(std::ostream &out, const vec3 &v) {
    return out << v.e[0] << ' ' << v.e[1] << ' ' << v.e[2];
}
Rust:
impl fmt::Display for Vec3 {
    fn fmt(&self, f: &mut fmt::Formatter<'_>) -> fmt::Result {
        write!(f, "{} {} {}", self.x, self.y, self.z)
    }
}
While in C++ you define the operator<< for standard stream operations, in Rust you need to only #[derive(Debug)] in order to have a debug printing of your custom struct. You may be now wondering what is the difference between Debug and Display and the question is quite simple. Debugging printing uses some heuristics to format our struct and print it in a predefined form with {:?} or {:#?} for a pretty-printed form, whereas using the Display trait allows the struct implementor to specify a custom form of printing. Because we have a need for a custom printing format we go ahead and implement it. Profit?
Structuring our project
This is a slight detour from our project development, although an important one. In C and C++ the custom is to have one header and one source file per class (or functionality), this is encouraged by the notion of Translation Unit - compiler-friendly name for a single source file and all necessary stuff from headers for this file. In Rust, however, there is no customary split between headers and source files (in fact all crate is a single TU), so how on earth the compiler understands how to resolve the symbols and what are the dependencies between them?
The answer is: namespaces. In Rust, we write all code in source files only and can write either a binary application or a library (in our case it is a binary). Structuring the code properly is a challenge but boils down to either:
- creating a namespace inside the same source file
- splitting the source file into modules
- moving our code to a library crate
These steps are illustrated somewhat accurately in this blog post, and serve as a complement to the official docs.
Hence, in order to see our Vec3 struct in our main.rs we need to first inform the compiler we are using another module - mod vec3; and then import the necessary types with use vec3::Vec3;. These types need to have a pub keyword next to them for the import to work. I will keep doing that for each new file that is created in the original tutorial, and if one is not necessary, it will be boldly stated here. In fact, renderer could be a library and the binary would only be using the functions from it to tell it what it wants to get rendered.
Who owns who?
Original Chapter 5
So far, so good. Assuming you went and read the original tutorial and implemented the code you were probably faced with an error similar to this:
error[E0382]: borrow of moved value: `ray`
    --> src/main.rs:23:50
       |
    19 | fn ray_color(ray: Ray) -> Color {
       |              --- move occurs because `ray` has type `Ray`, which does not implement the `Copy` trait
    20 |     if hit_sphere(&Point3::with_values(0.0, 0.0, -1.0), 0.5, ray) {
       |                                                              --- value moved here
      ...
    23 |     let unit_direction: Vec3 = Vec3::unit_vector(ray.direction);
       |                                                  ^^^^^^^^^^^^^^ value used here after move
What on earth is going on here? Remember the time we added a #[derive(Copy)] statement to the Vec3 class? Our Ray class requires such a statement to inform the compiler it is Copyable. But wait, this now has two Vec3s and they each have 3 doubles(f64) and this starts to amount to a significant overhead when passing on the stack - 2 * 3 * 8 = 48 bytes!
Of course we may pretend such puny numbers do not bother us, but if we wanted to implement this renderer on anything slightly less powerful than our PC, we should strongly consider changing this approach. I guess I need not explain this further to a C++ dev *shrugs*.
What we do instead is pass the value by a reference or in Rust terms borrow it. Borrows come in two flavors: immutable (the default ones, also called shared) - & and mutable - mut&. There are two rules which cannot be broken
- You can have either one mutable reference or any number of immutable references
- References must always be valid
This is all, no more rules? Yes, this is the cornerstone of Rust’s ownership model and it makes much easier to understand how it all fits together. Be sure to read up on this chapter of the Rust Book in order to be on the same page here.
So, now we are borrowing things instead of copying them like this:
// function
fn hit_sphere(center: &Point3, radius: f64, ray: &Ray) -> bool {…}

// call site
if hit_sphere(&Point3::with_values(0.0, 0.0, -1.0), 0.5, &ray) {…}
As you can see we are passing in an immutable reference borrowing the Ray for the time of the hit_sphere call. Keep in mind that it is in stark contrast to C++ where passing an object without a & or const& tag did a copy of the object and in Rust we have either a copy (if it satisfies the Copy trait) or a move, similar to C++ std::move.
Traits, Box and Rc
Original Chapter 6
So far, we were using only structs and things associated with them to achieve our goals. Now, it is a good time to learn about traits and trait objects. trait is like an interface in C++ (okay, you got me, there is no such thing in C++, there are pure virtual classes), allowing for dynamic dispatch of the function call. They in fact allow for much more, but this time we are considering them only as trait objects. This means, that their size is evaluated at run-time rather than at compile-time. For this we need to store them on the heap rather than on the stack.
In order to be stored on the heap they have to be wrapped in a special Rust’s built-in - Box. I won’t dig into details on this type, except mentioning it allocates the object it boxes on the heap (or whatever the custom allocator you provide for it #77187. Because of that we are conforming to Rust’s rules on types with a known size and can happily store such trait objects like this: Box<dyn Hittable>. The dyn keyword the key here - it is the marker telling this is not a regular trait. [Polymorphism in Rust] elaborates on this topic and provides further references.
Thus, being familiar with this concept you try to implement the HittableList class in Rust and you encounter std::vector and std::shared_ptr. While you already know about Vec, you need a replacement for std::shared_ptr - Rc. This type is a Reference Counted pointer, so behaves similarly to its C++ sibling. It is not thread-safe however, so remember to use its cross-thread counterpart - Arc. Both of them also, obviously store their contents on the stack - otherwise would be quite difficult to be shared between threads or different parts of the project.
Great, knowing all this, you finally translate the code (solve several problems with references and ownership on the way) and meet this brow-raising error:
error[E0382]: use of moved value: `temp_rec`
  --> src/hittable_list.rs:42:34
   |
35 |         let mut temp_rec: HitRecord;
   |             ------------ move occurs because `temp_rec` has type `HitRecord`, which does not implement the `Copy` trait
...
42 |                 closest_so_far = temp_rec.t;
   |                                  ^^^^^^^^^^ value used here after move
43 |                 *rec = temp_rec;
   |                        -------- value moved here, in previous iteration of loop
The code for this part looks like this in C++:
bool hittable_list::hit(const ray& r, double t_min, double t_max, hit_record& rec) const {
    hit_record temp_rec;
    bool hit_anything = false;
    auto closest_so_far = t_max;

    for (const auto& object : objects) {
        if (object->hit(r, t_min, closest_so_far, temp_rec)) {
            hit_anything = true;
            closest_so_far = temp_rec.t;
            rec = temp_rec;
        }
    }

    return hit_anything;
}
Rust attempt:
impl Hittable for HittableList {
    fn hit(&self, ray: &Ray, t_min: f64, t_max: f64, rec: &mut HitRecord) -> bool {
        let mut temp_rec: HitRecord;
        let mut hit_anything: bool = false;
        let mut closest_so_far = t_max;

        for object in &self.objects {
            if object.hit(ray, t_min, closest_so_far, &mut temp_rec) {
                hit_anything = true;
                closest_so_far = temp_rec.t;
                *rec = temp_rec;
            }
        }

        hit_anything
    }
}
And now, before you start doubting your whole existence, let me explain why (and how) not to translate C++’s return-by-reference code. Remember that Rust is fond of moving rather than coping (unless the type is marked Copy), and here the temp_rec variable gets set(otherwise Rust will nag you about the uninitialized variable) and then is read from in the loop to be finally assigned to the outbound reference. And this is where all the trouble happens… Here, the temp_rec is moved out and Rust cannot trust you that it will be initialized again in the successive iterations. After some clarifications on reddit the problem boils down to passing uninitialized memory to a Rust function. This can be done with the unsafe code or a special wrapper - core::mem::MaybeUninit
Since this guide is meant to introduce you to Rust and how it achieves its goals, this is a perfect opportunity for some rustacean culture!
Enter Option - Rust’s type for values that may or may not have a value (std::optional). hit function is a good candidate as this type’s user as it both returns by reference and returns a success value. So let’s see how this code would look like with this type instead:
impl Hittable for HittableList {
    fn hit(&self, ray: &Ray, t_min: f64, t_max: f64) -> Option<HitRecord> {
        let mut temp_rec: Option<HitRecord> = None;
        let mut closest_so_far = t_max;

        for object in &self.objects {
            match object.hit(ray, t_min, closest_so_far) {
                Some(rec) => {
                    closest_so_far = rec.t;
                    temp_rec.replace(rec);
                }
                None => {}
            }
        }

        temp_rec
    }
}
Notice how the bool variable is gone and the code seems to be more understandable (at least for me). Gone is the misleading out-reference, and the function returns a Option<HitRecord> which is more idiomatic. What you may have noticed is that this type takes either a None or Some(value) for its contents. We initialize it with None and then if the hit function returned a Some we do our true branch. Otherwise we do nothing as indicated by None => {}. The match clause is a powerful tool which was one of killer features when my colleague sold this language to me a while ago. If you forget about the mut modifier next to the variable’s type, no worries - Rust will notify you about it 😁
There are small changes that need to be made in the sphere.rs file:
let mut rec: Option<HitRecord> = Some(HitRecord::with_values(ray.at(root), root));
let outward_normal: Vec3 = (rec.as_ref().unwrap().p - self.center) / self.radius;
rec.as_mut().unwrap().set_face_normal(ray, &outward_normal);
The HitRecord variable is now initialized with Some and is modified later with as_ref().unwrap() combo. Be careful with using unwrap() though - it’s like telling the compiler: I know then value is not None, just give it to me!, so when it is indeed None, the code will panic. Similarly, if you wish to modify the object stored in the Option, call as_mut() before doing so. Finally we return the Option<HitRecord> as before.
Adding external crates and global variables
Original Chapter 7
In this chapter, we implement antialiasing using (not so) random capabilities of our hardware. For that we need a random number generator and while C++ has its #include <random>, Rust does not have a built-in for random numbers. Thus we will need to make use of our build and package manager - Cargo. As you already know, it handles most of the irritating details for us and lets us focus on the actual programming (while still allowing for plumbing the build machinery).
Adding a dependency to Cargo is as easy as including it in the Cargo.toml like this:
[dependencies]
rand = "0.8.3"
This follows the semver versioning system, which is quite easy to grasp. At this point I would also like to propose an alternative to manually adding the dependency with the command cargo add. It is not a built-in and requires you to install cargo-edit, which is a set of tools endorsed by the Rust language.
With the new rand package added, we may create our random-generating function. Honestly, I was not sure if it was worth creating a new function for this as the call is simply:
use rand::prelude::*;

#[inline]
pub fn random_f64() -> f64 {
    rand::thread_rng().gen()
}
While the original uses static function variables, meaning they are shared through all function calls. In Rust, however, there are no such things, and the global mutable shared state is strongly discouraged. There are some alternatives, like the singleton pattern, but this would be too much for now. Thus, we remain steadfast in our initial implementation, knowing the tread_rng object is created each time we call random_f64.
Handling Errors
The rest of the original tutorial will guide you through the complex maths of rendering different materials and making the camera much more flexible. Notable differences include implementing a trait for Materials and matching on Options instead of usual branch conditions. Feel free to look up the repo if you are stuck - but try to push it yourself and let the Rust compiler guide you 😄
Although this tutorial does not cover the language extensively (there is only so much one can do with a short project), it strives to show you some of most prominent features of the Rust programming language (copyright). Leaving out error handling would be a disgrace, so here they are: recoverable errors and unrecoverable errors. The latter were discussed briefly when introducing unwraps on the Option type, while the former were not mentioned at all yet.
Recoverable errors are those, which signal an improper condition in the program, but do not abort it, simply try to mitigate (if possible) any consequences induced by such an error. For example, we had our function, which saved data to a impl std::io::Write buffer, and this write is not guaranteed to succeed. For instance, we are writing it to a file descriptor that is already closed by a different thread, or it is being written over the network and there was failure delivering the packet (this is of course quite stretched reason but you get the point). In such case we should handle this failure and probably reprocess this chunk of data, or at least signal this to the user.
So in our case we can change the signature of our function to be:
pub fn write_color(
    stream: &mut impl Write,
    pixel_color: Color,
    samples_per_pixel: i32,
) -> Result<(), io::Error> {
    let mut r = pixel_color.x;
    let mut g = pixel_color.y;
    let mut b = pixel_color.z;

    // Divide the color by the number of samples
    let scale = 1.0 / samples_per_pixel as f64;
    r = (scale * r).sqrt();
    g = (scale * g).sqrt();
    b = (scale * b).sqrt();

    match stream.write_fmt(format_args!(
        "{} {} {}\n",
        (256.0 * r.clamp(0.0, 0.999)) as i32,
        (256.0 * g.clamp(0.0, 0.999)) as i32,
        (256.0 * b.clamp(0.0, 0.999)) as i32
    )) {
        Ok(_) => Ok(()),
        Err(e) => Err(e),
    }
}
You can see, that the ubiquitous match construct is used once again here. Of course at the callee side we should do something with our error, and for this simple problem I will simply report it to the stderr like this:
match write_color(&mut handle, pixel_color, SAMPLES_PER_PIXEL) {
    Ok(_) => continue,
    Err(e) => eprint!(
        "Oops, error {} saving pixel {} for indices i {} j {}",
        e, pixel_color, i, j
    ),
}
You can see the obvious downside to this? Yes, while verbosity is often a desired feature and makes understanding code easier, being over-verbose counters this effect, effectively (no pun intended) bloating the code - rendering it tedious to comprehend. Thankfully we have a syntactic sugar made just for this occasion - ? operator. This allows for propagating any error that arose until it is finally handled in the outer scope. So now we simply write:
stream.write_fmt(format_args!(
      "{} {} {}\n",
      (256.0 * r.clamp(0.0, 0.999)) as i32,
      (256.0 * g.clamp(0.0, 0.999)) as i32,
      (256.0 * b.clamp(0.0, 0.999)) as i32
  ))?;
and we handle the error in the main function. Of course we need to change mains signature to also return a Result<(), io::Error>.
This is by no means complete introduction to error handling and this subject is quite broad. I recommend of course reading the chapter on error handling in the official book and then follow various resources liked there for building on top of it.
Conclusions
Whew, that was quite a lot of information to digest. I hope you took your time and learned some valuable knowledge about the language and how it differs from the C++ or other languages you are familiar with. I skipped over some subjects, like unsafe Rust or embedded Rust applications. There is also much more you can do with the trait system, concurrency, async programming and closures. There are also many other functional topics and of course data structures, under the guise of collections.
All credit for the raytracer algorithms + the guide I based this post on, goes to the author - Peter Shirley. Once again, thank you for sharing with us your expertise about computer graphics and providing the readers with valuable insights and tricks. If you are interested in deepening your knowledge on this topic - check out his other books.
Also, thank you kind reader for the patience to read this thing through. Don’t hesitate to leave review below or reach to me directly via my mail. Enjoy the newly met Rust language and let it help you in your programming adventures!
Ending words
As of today, the subject of the error handling is so important, there is a whole project group in the Rust community, of which I am a proud member. Come over and chat with us if something is bothering you about the current state of error handling or you would like to get involved in the process.
If you like what I’m doing and you would like to see more of it - consider buying me a [coffee] ☕ [coffee]: https://www.buymeacoffee.com/jduchniewicz
5124 Words
2021-02-28 14:37 +0000